This post may contain affiliate links. This blog generates income via ads.

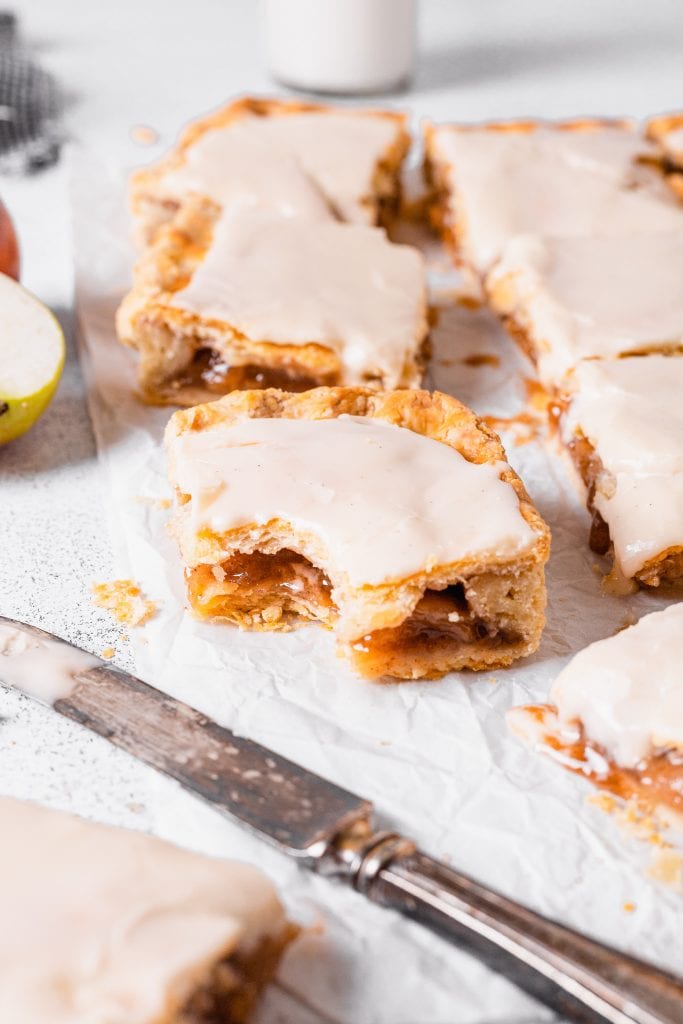
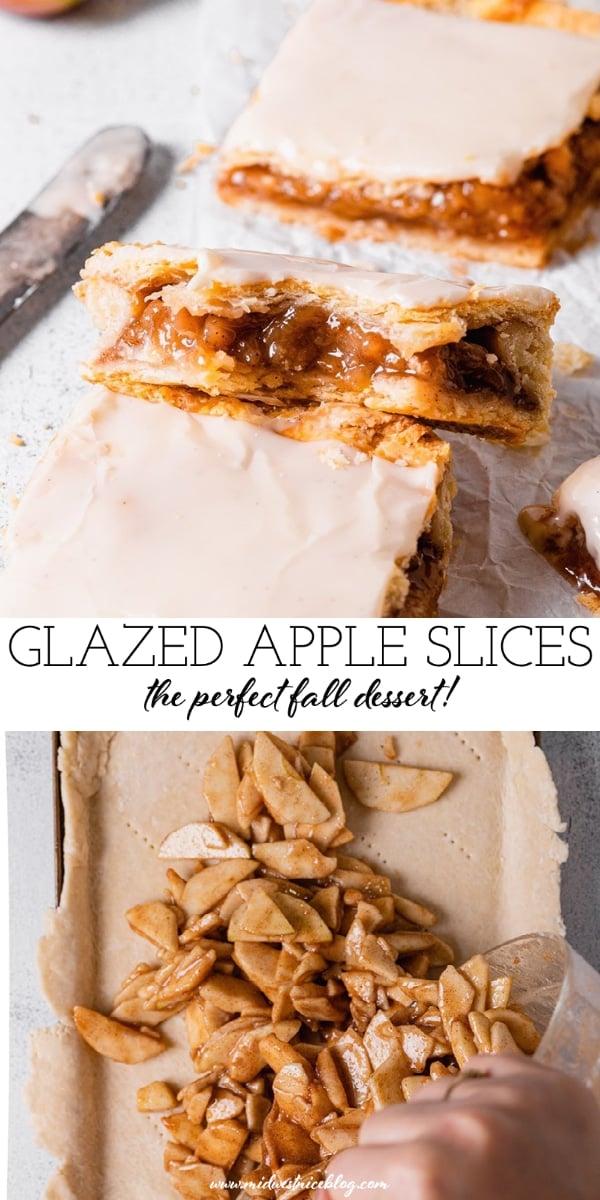
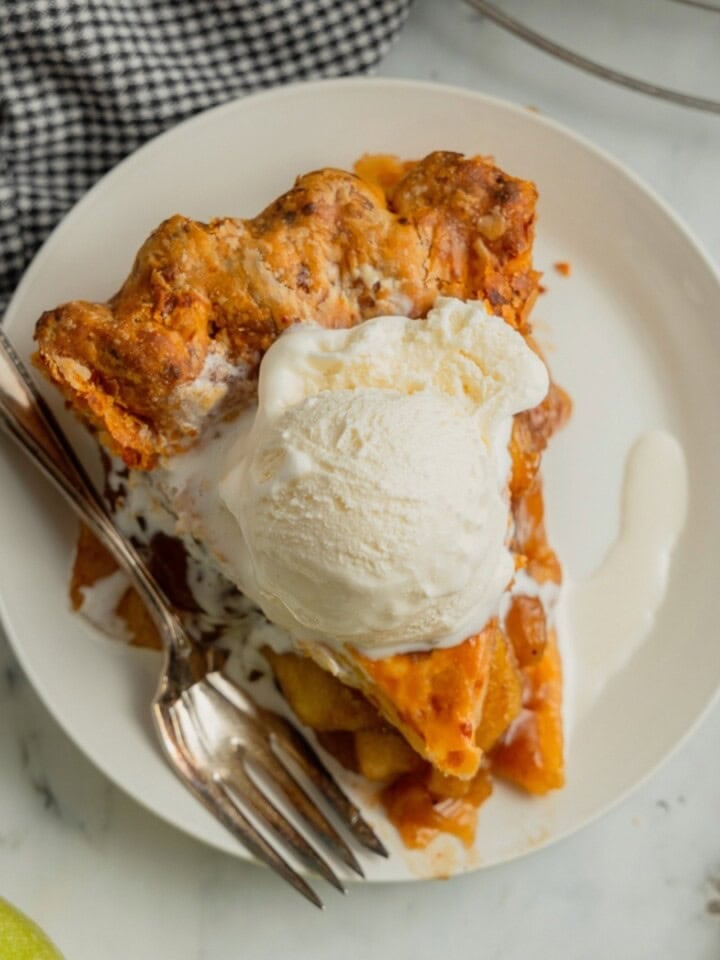
Glazed Apple Slices are the perfect dessert for fall. Cinnamon scented apples bake up beautifully in a flaky pie crust that is topped with a simple powdered sugar glaze. Made in a sheet pan for easy assemble and serving, they're fruit-flavored heaven!

These apple squares are the easier, more portable, servable, and sharable cousin of apple pie that originated in Chicago (where my dad's family is from!) With all the classic flavors and components of a traditional pie in a simple square, they’re sure to be your new favorite pie recipe!
I have been eating apple squares for my entire life. And possibly in the womb. My grandmother, who was from Bridgeport, made them for decades while living in Chicago and after moving to Wisconsin. They are a much beloved and sought after dessert in our household.

My husband declared these bars so good that “if we weren’t already married these apple slices would have made me propose.” What better review is there than that?

How to make Glazed Apple Squares
This is just a brief overview, find detailed instructions in the recipe card below!


Keeping Apples from Turning Brown
This recipe is a bit time intensive, between the making, resting, and chilling of the pie crusts and then the baking and cooling time of the glazed apple slices themselves.
I like to divide the process among two days to lighten the load a little bit. On the first day I will make the crusts and prepare the apples for cooking.
Of course, this means that the apples run the risk of turning brown. This happens when cut apples meet oxygen and the fruit begins to oxidize. It is perfectly safe to eat, but not very pretty. Luckily, there’s a trick to avoid brown apple slices!
Place sliced apples in a large bowl with ¼ cup fresh lemon juice and toss to coat. Cover tightly with plastic wrap and refrigerate overnight. Voila! No more brown apples!
An apple dessert is only as good as the crust it’s baked in. And boy, is this crust the absolute best! It took me awhile to get the hang of it. Walking the fine line between moisture and manipulation. But! I’ve finally got it! A perfectly flaky pastry crust that's a winner every time.

Making Perfect Flaky Pie Crust


If chilling the dough overnight, remove from the fridge 10 - 15 minutes prior to rolling. This allows the crust time to warm up a bit (without melting the butter!) and will prevent it from cracking under the pressure of your rolling pin.
Making pastry glaze
Check out my pumpkin cookies with maple glaze for an in-depth guide to making powdered sugar glazes!

Watch the recipe video!

Glazed Apple Slices
Equipment
- 12x9 inch Jellyroll Pan
- Rolling Pin
- Pastry Brush
Ingredients
For the crusts:
- 4 cups flour
- ¼ cup sugar
- 1 cup salted butter cut into large cubes and chilled
- ¼ cup lard chilled
- ½ cup ice water
For the apple filling:
- 2 pounds baking apples such as Granny Smith, peeled and sliced thin
- 1 tablespoon lemon juice
- 3 tablespoon corn starch
- 1 cup brown sugar
- 1 tsp. ground cinnamon
- ½ tsp. ground ginger
- ¼ tsp. ground nutmeg
- ¼ tsp. allspice
- Pinch of cloves
- ½ tsp. of salt
- 1 tsp. Vanilla extract
- 1 egg whisked with 1 tablespoon water
For the glaze:
- 2 cups powdered sugar sifted
- 2 tablespoon whole milk
- 2 tsp. vanilla extract
Instructions
For the crusts:
- In a large mixing bowl, whisk together the flour and sugar. Using your hands, gently toss the butter and lard into the dry mixture. Next, push each large piece of butter in between your thumb and index finger. This will sort of flatten out the butter pieces and break them up.
- Working slowly, add the ice water to the dry mixture, one tablespoon at a time, mixing well after each addition. Dough is ready when it holds together in a ball after being pressed, with minimal cracks along the surface. Refer to my entire post all about pie crust for a very in-depth walk-thru.
- Divide dough in half, pat into a small square, sprinkle with a few drops of water, and wrap tightly in plastic. Chill in fridge for at least 30 minutes, if not longer, preferably overnight.
- When ready to roll out, lightly dust work surface and rolling pin with flour. Roll one batch of dough into a rectangle that is 1 inch larger on all sides than your jellyroll pan. Place the first batch of rolled dough in the pan and prick with a fork. Place in fridge to chill.
- Roll out the second crust to another rectangle of the same size and place on cookie sheet or cutting board lined with parchment. Place in fridge to stay cool while you prepare the filling.
For the filling:
- Preheat oven to 350 degrees.
- In a large bowl pour the lemon juice over the sliced apples and toss to coat. Do the same with the corn starch.
- Add the brown sugar, spices, salt, and vanilla extract to the bowl. Tossing to coat.
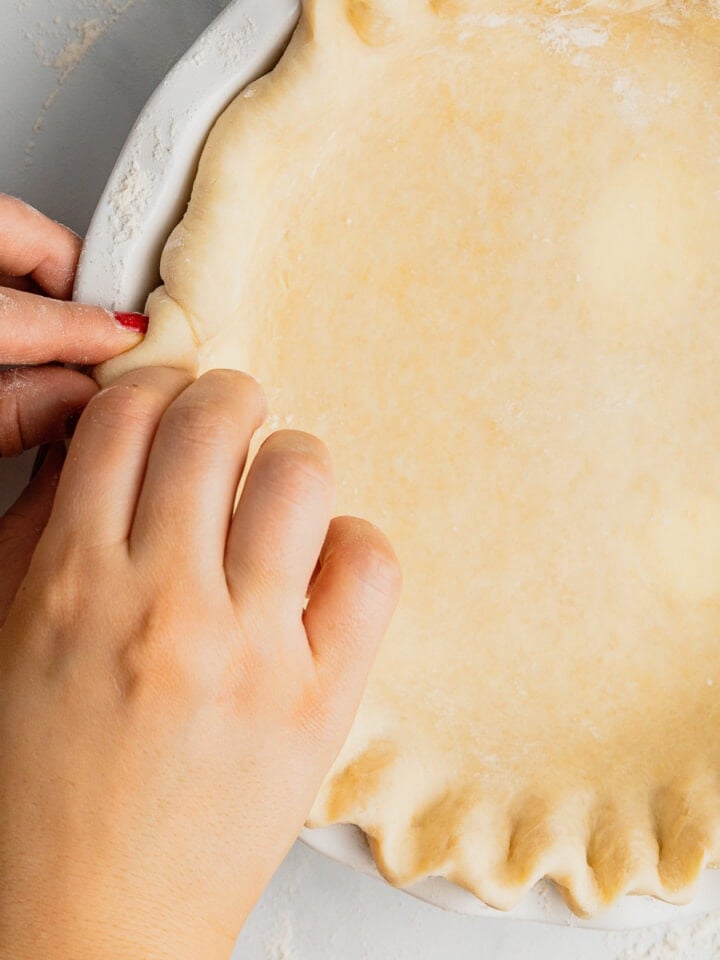
- Pour the filling into the prepared crust in the jellyroll pan and top with the other crust. Fold top crust over the bottom and pinch to seal, crimping with fingertips. Brush crust with egg wash and slice slits in the top to release steam.
- Bake in preheated oven 40 - 45 minutes, or until crust is golden brown and apples are tender.
- Remove from oven and cool on wire rack for at least one hour.
For the glaze:
- When slices are nearly cool, whisk together the 2 cups powdered sugar, 2 tablespoon milk, and 2 tsp. vanilla extract until smooth. Spread glaze over cooled apple slices. Slice into 12 equal squares and serve.
Video
Notes
- If preparing the crust a day in advance: remove from refrigerator 15 minutes prior to rolling out. This will help prevent the crust from cracking at the edges when rolling.
- If preparing the apples a day in advance: toss with ¼ cup lemon juice and omit the 1 tablespoon lemon juice from the original recipe the following day. Proceed with remaining recipe as written after draining the apples.
Nutrition
· by Amanda Gajdosik