This post may contain affiliate links. This blog generates income via ads.
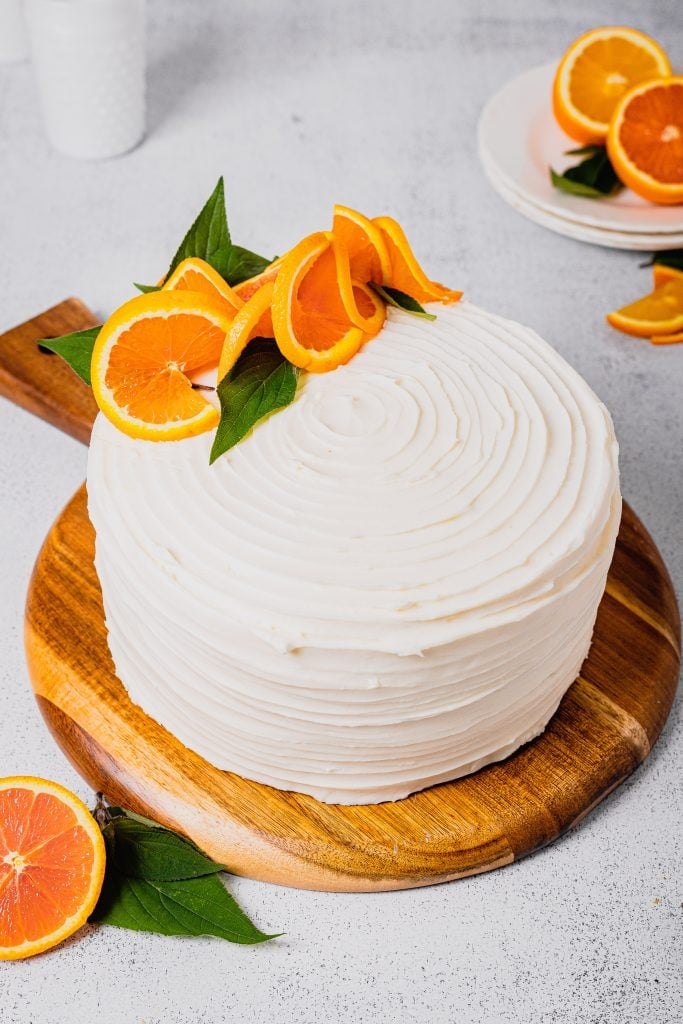
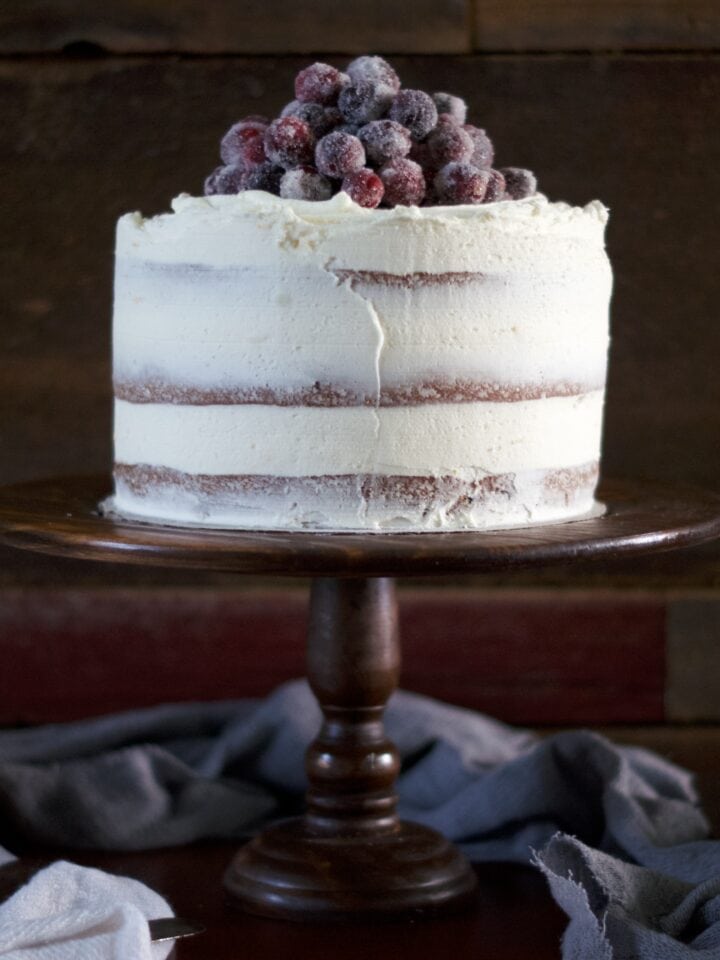
When the craving for something sweet strikes this orange cream layer cake satisfies in every way! A moist sponge scented with real orange is held together with light and fluffy homemade cream cheese frosting for a bright and refreshing dessert!

I have been craving and wanting this cake for so long. A cake with a moist crumb that’s held together with decadent cream cheese frosting. A layer cake that is simple but stunning in every single way.
Making a real orange cake
When developing this cake, I wanted it to have lots of orange flavor, but without anything super artificial and fake. I wanted to it to taste like a fresh orange. I harnessed the power of produce in a few ways – using both the zest and juice of the orange in the cake and a simple syrup to soak the cake. A teaspoon of orange extract only heightened the delicious natural flavors of this cake!

Instructions
- Whisk the dry ingredients.
- Rub the zest into the sugar. So much flavor!
- Cream the sugar, butter, and oil. Add the eggs and extracts.
- Add the dry ingredients into the batter, alternating with the milk as with all cake recipes.
- Divide the batter among prepared pans and bake until golden.
- While the cake bakes, make a wonderful orange simple syrup.
- When the cakes are cool, soak them with the syrup.
- Frost the cake with cream cheese frosting!


Tips for baking a layer cake
- Pans. When it comes to pans I’ve found the following method to work the best for me. First, make sure you’re using the right kind of pan. I LOVE these aluminum pans and never, ever use a dark coated pan. Dark coated baking pans will alter the baking time of whatever is in the pan because dark absorbs heat. Science! Then, I coat the aluminum pans with a light layer of baking spray, place a round piece of parchment paper on the bottom, and lightly coat the pan again. No flour, no butter, no shortening. Just cheating with baking spray and parchment paper.
- Wet ingredients. It’s important that all the wet ingredients – the eggs, butter, milk, etc. are at room temperature when beginning the recipe. If there is any amount of chill on the ingredients the entire batter could separate or curdle. Unfortunately, there’s really no rescuing it once it’s gotten to that point. I leave my butter on the counter overnight, place my eggs in a bowl of hot water, and microwave my milk for 22 seconds to be sure everything is warm enough.
- Mixing. Gentler is better when it comes to making cakes. Overmixing can lead to a flat and tough sponge, undermixing can lead to a cake that doesn’t bake properly because it hasn’t been thoroughly mixed, leaving pockets of dry ingredients or fats not fully incorporated. I always stop my mixer after every addition of dry ingredients to scrape down the sides and bottom to ensure everything is evenly mixed.

Why do you soak a cake in syrup?
In addition to adding some delicious orange flavor the simple syrup plays another key roll in layer cake making. Adding simple syrup to layer cakes (or really, any cake!) will add moisture and help keep the cake fresher for longer. I like to brush the syrup on in a generous layer with a silicone baking brush.
How to store a layer cake
I have an old Tupperware cake carrier that I stole from my mom who had it for a few decades before I turned up on the scene and couldn’t recommend one more! I always place my cake inside of it and then into the fridge to ensure freshness. I then remove the cake 30 minutes before serving to bring the cake up to room temperature. Once the cake is cut, pieces of parchment paper on either of where the cake was cut into will keep the cake from going stale.
So you can enjoy slice after slice of this delicious orange cream layer cake!


Orange Cream Layer Cake
Equipment
- Cake Turntable
- Mixer
- 8-inch Cake Pans
- Offset Spatula
Ingredients
For the cake:
- 2 Oranges zested
- 1 ½ cups sugar
- ¾ cup unsalted butter at room temperature
- ½ cup canola oil
- 3 large eggs at room temperature
- 1 tsp. vanilla extract
- 1 tsp. orange extract
- 3 cups flour
- 2 tsp. baking powder
- 1 tsp. baking soda
- ¾ tsp. salt
- 1 ½ cups whole milk at room temperature
For the orange simple syrup:
- ½ cup fresh orange juice from those 2 zested oranges above
- ½ cup granulated sugar
For the frosting:
Instructions
For the cake:
- Preheat oven to 350 degrees. Spray 3 8-inch round cake pans with baking spray, line bottoms with parchment rounds and spray again, set aside.
- In the bowl of a stand mixer, rub the orange zest into 1 ½ cups of the sugar until fragrant and blended.
- In a separate bowl, whisk together the flour, baking powder, soda, and salt. Set aside.
- Cream together the orange sugar, butter, and oil until light and fluffy, about 5 minutes. Mixture should be pale white. Scrape down sides of bowl and necessary.
- Add eggs to sugar mixture one at a time, mixing until fully incorporated. Stir in vanillaand the orange extract scraping down sides of bowl again.
- Working in three batches, add the dry ingredients to the wet ingredients, alternating with milk, ending with flour. Scrape down the sides of bowl after each addition of flour, being sure batter is thoroughly mixed.
- Evenly distribute batter among prepared pans. Bake in preheated oven for 35 minutes, or until cakes have risen and begun to pull away from sides, and a tester inserted into the center comes out clean. Remove from oven and allow cakes to cool in pans, on wire racks, for ten minutes. Turn cakes out of pans and cool to room temperature.
For the orange simple syrup:
- While the cakes bake, combine the other ½ cup sugar with the ½ cup orange juice in a small saucepan. Heat until sugar has melted. Remove from heat and allow to cool.
To frost the cake:
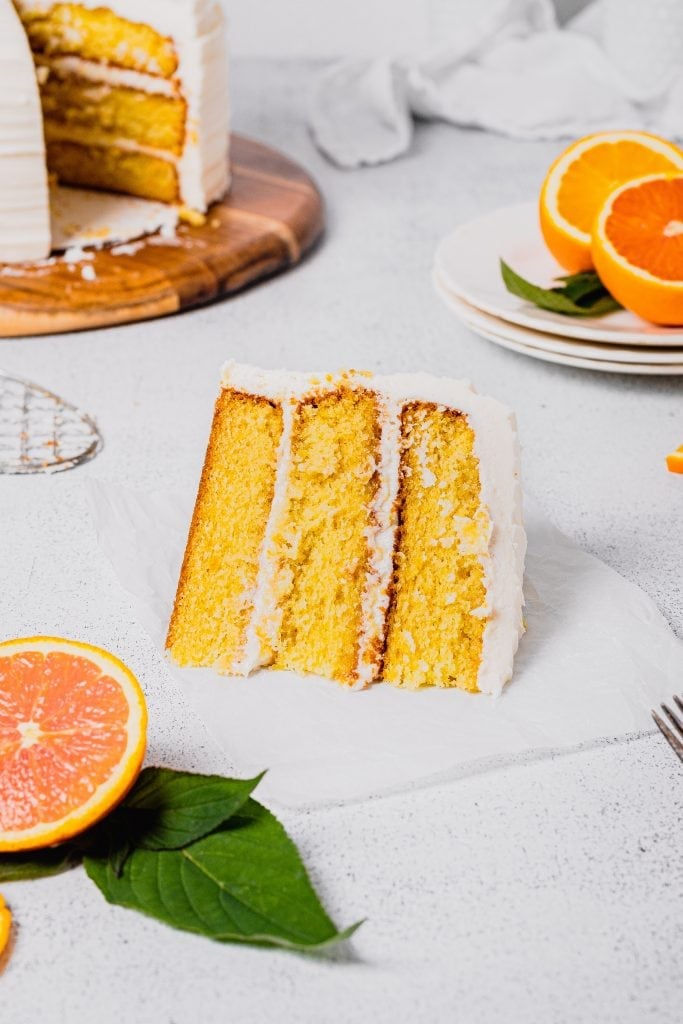
- Once cake is cooled, slice off any uneven tops to leave you with three level layers. Using a pastry brush, soak cakes with orange simple syrup and allow it to soak in for a few minutes.
- Place one layer on a cake board and cover with a generous layer of frosting, so that the extra overflows onto the sides. Top with the second cake layer and repeat the process of frosting the top and letting the excess overflow. Finish with the third cake layer.
- To crumb coat the cake: frost the sides of the cake with the residual frosting that is along the sides of the cake layers and place in fridge for at least 30 minutes.
- Remove the cake from the fridge and cover in whatever frosting remains. Place back in fridge, removing at least 30 minutes before serving.
Notes
- Cake can be stored in an airtight container for up to three days.
- Alternately, you can bake and freeze the layers – simply wrap tightly in plastic wrap before cool and defrost and frost (ha!) when ready.
aniqahsblog says
This cake looks so delicious!
Amanda says
It was!
PriyaPandian says
Looks awesome!
Amanda says
Thank you!
thestaticfoodbin says
Let me have a slice, Amanda! 😉
anintroverttalks says
So pretty! <3
Amanda says
Thank you!
Jess says
This cake looks perfect Amanda; so moist on the inside. Great job Amanda!
Amanda says
Thank you, Jess! It really was superb!